
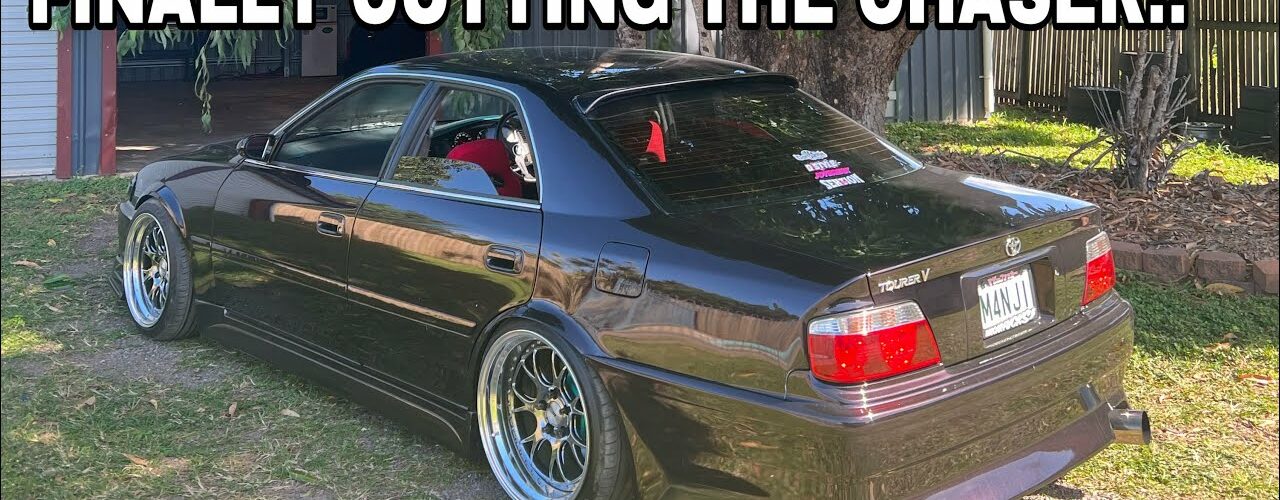
Cutting the Chaser!! JZX100 Revamp Pt.1 – How to Weld on Fender Flares
The Toyota Chaser JZX100 is a popular car in the drifting scene. It has a cult following because of its rear-wheel drive layout, six-cylinder engine, and sporty look. However, like any car, it can be improved. One way to enhance its appearance and performance is by installing fender flares. Fender flares not only give the JZX100 a more aggressive look but they also allow for wider wheels and tires. In this article, we will take a look at how to weld on fender flares onto the JZX100. This is part one of a series of articles discussing the revamp of a JZX100.
Why Welding?
There are several ways to install fender flares on a car. However, welding is the most permanent and secure way. Fender flares installed with screws or rivets can come loose or get damaged over time, especially if you plan to use the car for motorsport. Welding guarantees the flares stay in place regardless of how hard you drive the car. It also provides a great way to seal any cracks or holes in the fender caused by rust. Finally, welding on fender flares gives you the opportunity to get creative by blending them with the bodylines of the car.
Tools and Materials Needed
- Fender flares
- Angle grinder or Dremel
- Welder (MIG or TIG)
- Welding wire (.030 in)
- Masking tape
- Painter’s tape
- Clamps
- Safety gear (gloves, mask, glasses)
The Process
Step One – Removing the Fenders
Start by removing the fenders from the car. You can do this by removing the bolts around the wheel arch and in the engine bay. This step is necessary to access the inner fender, which is where the flares will be welded.
Step Two – Cutting the Fenders
With the fenders removed, it’s time to cut them. Use an angle grinder or Dremel to cut along the outer edge of the fender arch. Make sure to take your time and cut along the fold line to keep the flares as close to the body as possible. Once you’ve cut along the fold line, remove any remaining metal using the grinder or Dremel.
Step Three – Bending the Fender Lip
Next, bend the fender lip outward using pliers or a hammer. This will give you access to the inside of the fender where the flares will be welded.
Step Four – Dry Fitting the Flares
Once the fenders have been cut and bent, dry fit the flares onto the fenders. Dry fitting will help you determine the correct positioning of the flares and make sure they line up with the bodylines of the car. Once you’re happy with the positioning, use masking tape to mark the edges of the flare onto the fender.
Step Five – Welding the Flares
Next, it’s time to start welding. Start by welding the edges of the flare onto the fender using your welder. Make sure to keep the welds clean and consistent along the entire edge. Once you’ve welded the edges, move on to the top of the flare. Use clamps to hold the flare in place while you weld it onto the fender. Make sure to work slowly and carefully to avoid any warping or buckling of the metal.
Step Six – Finishing the Welds
Once you’ve welded the flares onto the fender, it’s time to finish the welds. Use a flap disc or sandpaper to smooth out any rough or uneven welds. This will ensure that the flares blend in seamlessly with the bodylines of the car.
Step Seven – Painting
Once the welds have been finished, it’s time to paint. Sand the entire fender, including the flare and the areas around it. Use painter’s tape to mask off any areas that you do not want to paint, such as the area around the headlights. Finally, paint the fender with your desired color.
Tips and Tricks
- Take your time when cutting the fenders. Rushing this step can cause you to cut too much or create an uneven cut.
- Make sure to weld the flare onto the fender in sections. This will help prevent warping and buckling of the metal.
- Use clamps to hold the flare in place when welding. This will help ensure that the flare is in the correct position and that the welds are straight.
- When painting the fender, use a primer before painting. This will help the paint adhere to the metal and provide a long-lasting finish.
Conclusion
Welding fender flares onto a Toyota Chaser JZX100 is a great way to give the car a more aggressive look and allow for wider wheels and tires. While the process may seem daunting, taking your time and following these steps will help ensure a successful installation. Welding also provides a more permanent and secure solution compared to other methods of installing fender flares. Stay tuned for part two of our JZX100 revamp series, where we’ll dive into installing coilovers.
Sources:
- https://drivingline.com/articles/how-to-install-fender-flares/
- https://www.hoonigan.com/blogs/hoonigan/how-to-weld-on-steering-angle-toyota-jzx100-chaser-drift-car-build-part-2?_pos=2&_sid=9efc1a5f5&_ss=r
- https://www.speedhunters.com/2015/07/where-skrapped-met-skylines-ferreiras-toyota-chaser/


Add comment